

Since we abandoned passwords to access web servers, SSH keys have been the primary way to connect to these servers. Simply generate a key pair, add the public key to the authorized_keys file of the server and you can connect. Unfortunately, many applications need to connect to these servers via your key and most people don't use individual keys but a master key for everything. That's fine until one application grabs the key and shares it with someone else who then has access to all your servers.
You can solve this issue by using an ssh-agent that manages the keys and authorizes applications but never shares your keys with the application itself. In this guide, we're using the 1Password SSH Agent of 1Password version 8 to connect to servers via Tinkerwell.
Tinkerwell only works with ED-25519 key if you pair it with 1Password at the moment. RSA key work fine for other connections but the SSH agent requires ED-25519 keys.
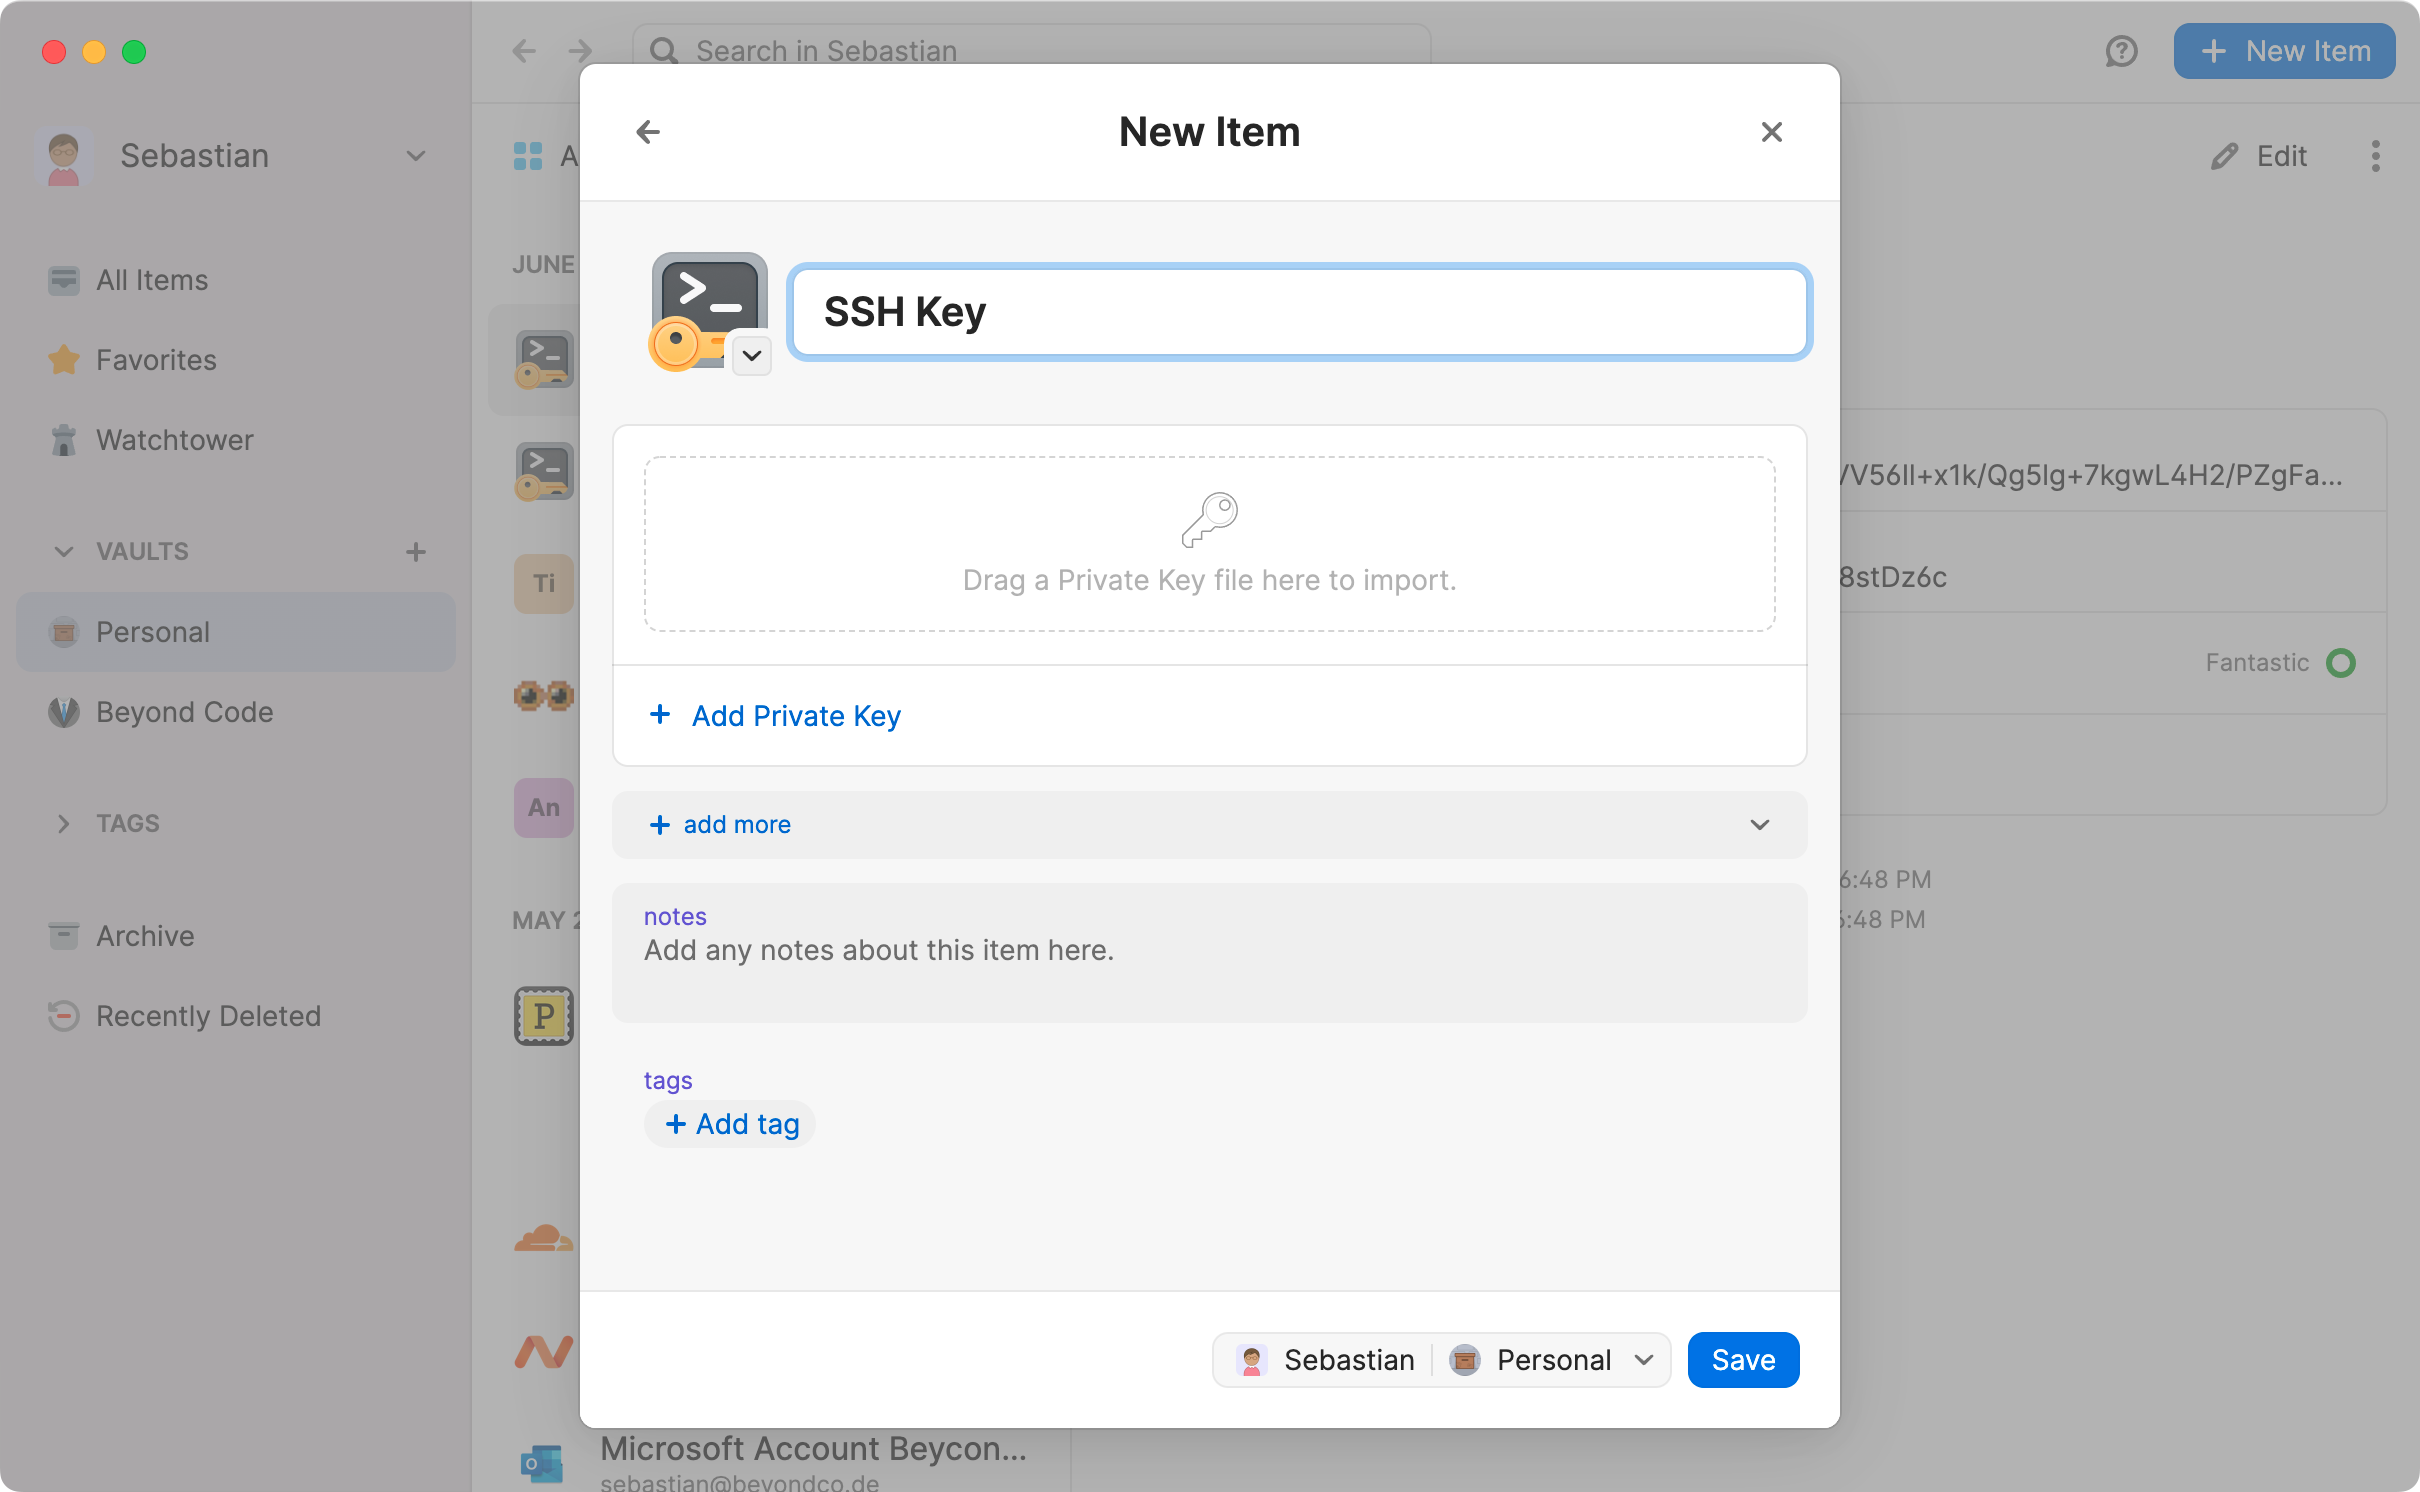
If you are using a new key, add this key to the server by adding the public key to the authorized_keys file.
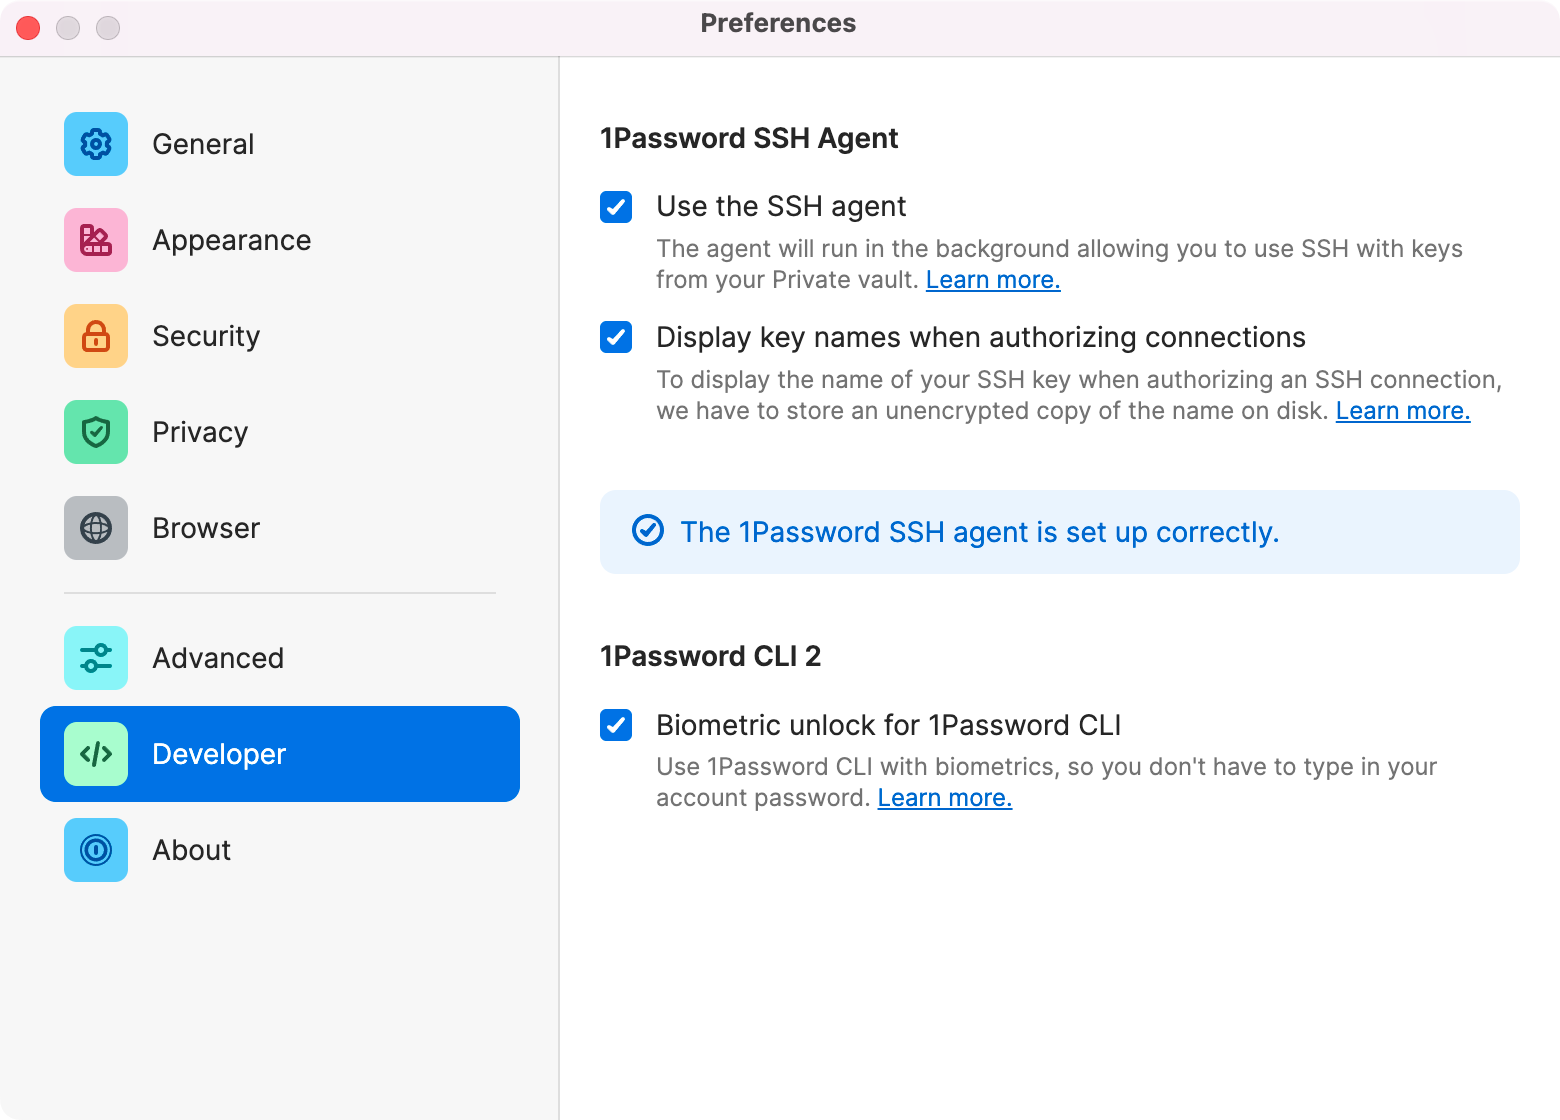
Your ssh-agent is set up, but your machine does not know which connections are connections managed with the agent. The easiest way is to switch all connections to the agent, you can do this by adding a wildcard host to your ~/.ssh/config file. If you want to introduce the ssh-agent for some servers only, add their hosts to the config file separately and enable the agent for them.
Host * IdentityAgent "~/Library/Group Containers/2BUA8C4S2C.com.1password/t/agent.sock"If you are working on Windows or Linux, you can check the configuration here.
Every time you connect to a server via SSH, the ssh-agent will step in and handle the connection without exposing the private key file to the application. So whether you connect to a server via your terminal, Table Plus or Tinkerwell, you have to authorize the connection via your 1Password password or fingerprint. This adds another level of security to your connection and allows you to create keys for new connections easily.
Create a new SSH connection within Tinkerwell – and select a key file so that Tinkerwell knows that a key is required. The key file can be a randomly generated one because Tinkerwell will use the ssh-agent on connect and you don't have to add the public key for this private key file to the server.
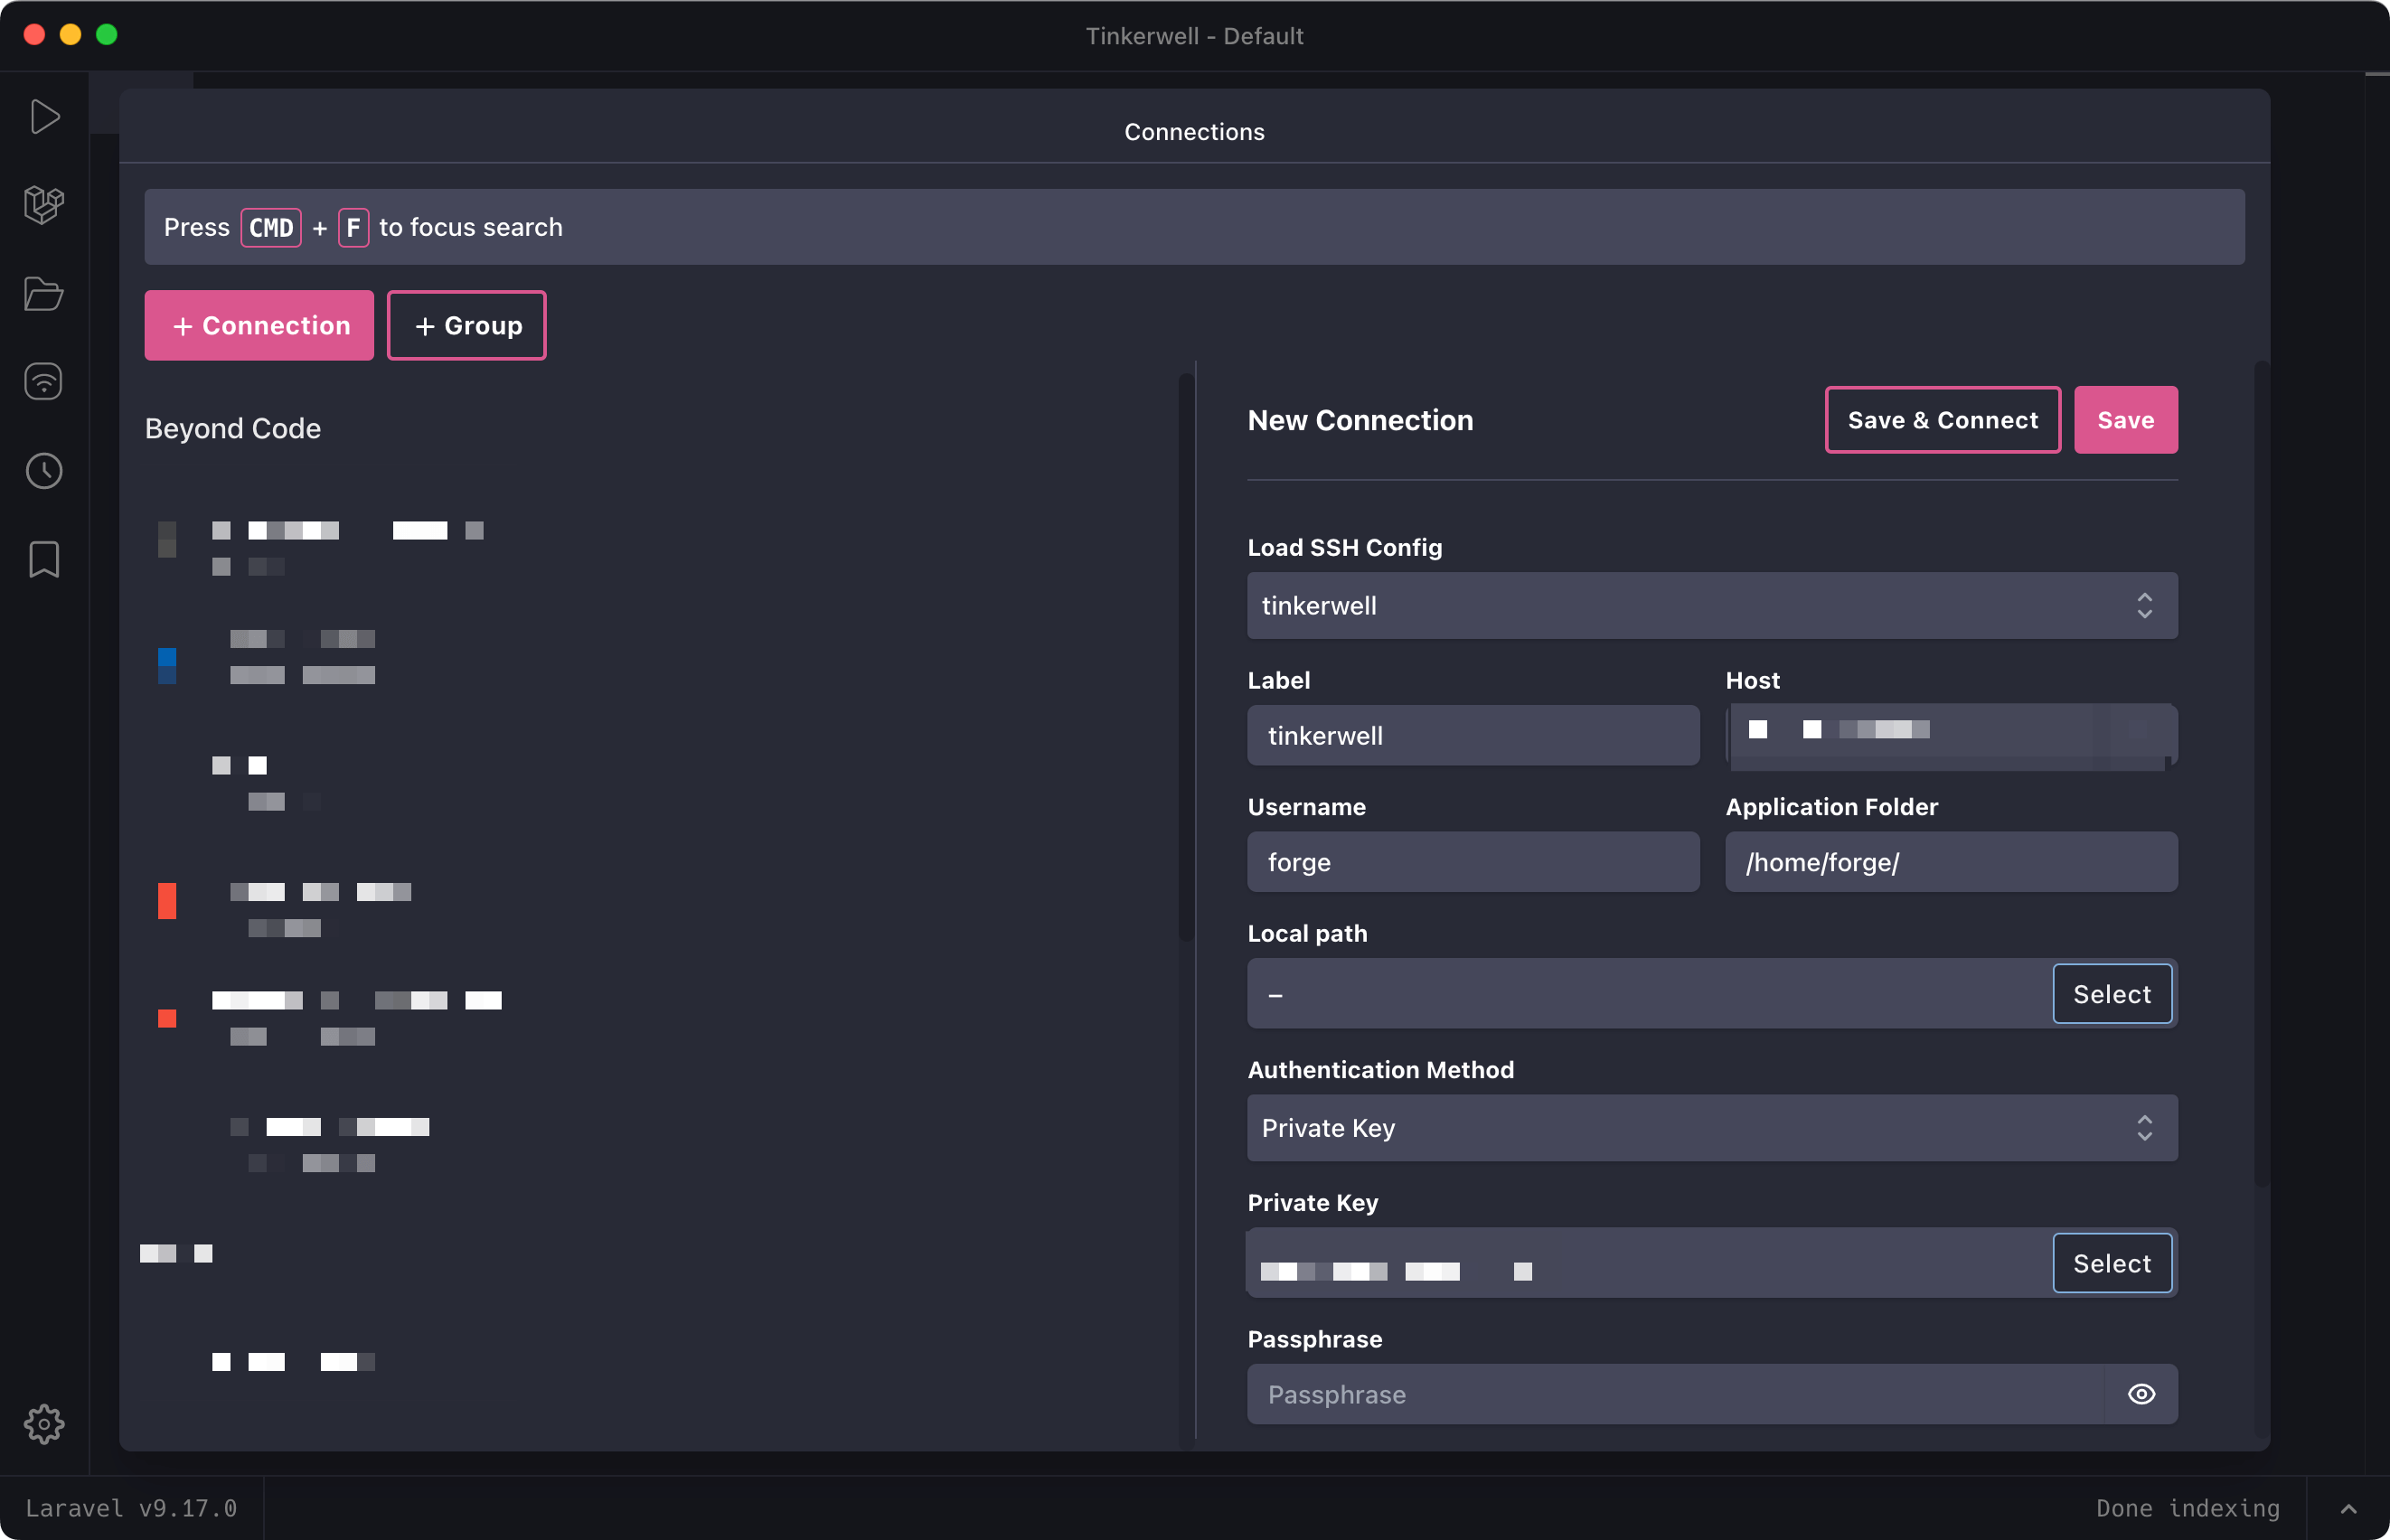
Connecting to a server requires your 1Password master authentication and does not share your private key with Tinkerwell anymore.

“Seriously, Tinkerwell is great, I genuinely use it every single day for testing snippets or checking production data.”James Brooks
Developer at Laravel

“I use Tinkerwell as my daily driver for prototyping different ideas and has become an even greater refactoring asset for most of my workflows. A tool like this is essential, period!”Mfawa Alfred Onen
Software Engineer
The must-have companion to your favorite IDE. Quickly iterate on PHP code within the context of your web application.
Buy now Learn more